

As a sewist, you know that the neckline is one of the most critical parts of any garment. Achieving a well-finished neckline can make all the difference in the final look of your project.
Two common techniques for finishing necklines are sewing a binding tape and sewing a bias neckband. We will explain the difference between the two techniques and provide step-by-step instructions to help you achieve a professional finish. Stay tuned for our favorite neckband, the french bias neckband!
If you would like to see the video on how to create and attach a Neckband to a Neckline, you can purchase that video along with 45 others, 125 sewing patterns, and instructions for just $67.
Watch the video and get the pattern membership today at SewingPatternSecrets.com
What is a binding tape?
A binding tape is a strip of fabric used to encase and create a neat edge to the raw edge of a garment’s neckline. It can be purchased pre-made, single or double folded, or it can be made from the same fabric as the garment.
Binding tape is typically cut on the bias, which allows it to stretch and curve around the neckline. No added length is added to the raw edge of the garment’s neckline, making it an excellent choice for necklines with a tight or specific fit.
What is a bias neckband?
A bias neckband is a strip of fabric cut on the bias folded in half and used to finish the neckline. The seam allowance is then turned to the wrong side and stitched in place enclosing all the raw edges under the seam.
It adds a bit of extra to the existing garment’s neck edge. It is sewn onto the garment in a continuous loop and can be made from the same fabric as the garment. Bias neckbands are typically wider than binding tape and are folded in half before being attached to the garment.
Differences between binding tape and bias neckband
While both binding tape and bias neckbands are used to finish necklines, there are some key differences between the two techniques.
Width
Binding tape is typically narrower than a bias neckband, usually measuring 1/2 inch or 1.27 centimeters in width when folded. This makes it easier to work with and provides a cleaner finish.
Bias neckbands, on the other hand, are wider, measuring about 1.5 inch or 3.81 centimeters, and provide a more decorative finish.
Stretch
The fabric that makes up Bias Tape is cut at a 45-degree angle, or along the “bias” of the fabric, which allows it to stretch and curve around the neckline. This makes it a good choice for curved necklines or necklines that need to be stretched, such as t-shirts.
Bias neckbands, because you make them, they are adjustable and you can control the amount of stretch. This is particularly helpful with knit fabrics. For example, you may have a 2 or 4 way stretch fabric, with 10% stretch in one direction and 25% stretch in the other. You might opt to cut the neckband so there is only 10% stretch.
Thickness
Binding tape is typically thinner (the depth of the fabric) than bias neckbands, making it a good choice for lightweight fabrics. Bias neckbands, are meant to be cut wider, are thicker when assembled and can provide more structure to the neckline.
Difficulty
Premade binding tape is easier to purchase and work with, but colors and fabric types are limited at your local store. A good place to look for variety would be on Etsy.
Handmade knit neckbands are more work and more difficult to create and sew on. After some practice, you will find they look better than store bought, and you have an unlimited variety of fabrics and colors to pick from.
Purchased woven neckbands will be easier to work with and sew on. There are more choices than ever on Amazon or Etsy for these types.
Constructing The Bias Tape or the Binding Tape
Creating a binding tape can be done in a few different ways, including single fold and double fold methods. Here’s how to create both:
Making Double Fold Binding Tape
Note: Both double and triple fold binding tapes can be used to finish the edges of a neckline, armhole, or hemline. The choice between double and triple fold may depend on personal preference or the thickness of the fabric being used. Triple fold had extra room inside the fold for thick fabric to be sandwiched inside such as fur, fleece or thick pile fabrics.
To make a double fold binding tape, follow these steps:
- Cut a strip of fabric on the bias (at a 45-degree angle to the fabric’s selvage edge). The width of the strip depends on how wide you want the finished binding tape to be, but a common width is 1.5 inches (3.8 cm).
- The length of the strip for a knit you can start with a 100% measurement of the inside curve of the raw seam edge of the pattern neckline. Measure completely around. I recommend 100% because it’s better to start with too much, then to end up with not enough. This will allow if you serge the edge. Some bias tape gadgets require that you will have to make extra long strips. For wovens you will have enough at 100%. For knits like stable jerseys with no elastine, or up to 5% elastine, or cotton interlock it is likely that you will use 90% of the length. You need to keep a 5/8″ seam allowance to join the ends of the strip anyway. So for those, just keep 100% of the measurement.
- Fold the strip in half lengthwise, right sides facing each other, and press it with an iron.
- Open up the strip and fold each long edge in toward the center crease. Press those in place.
- Fold the strip in half along the original crease so that the folded edges are enclosed, and press one more time. You should now have a strip of fabric that is four layers thick, with the raw edges hidden inside when closed.
Making Triple Fold Binding Tape
To make a triple fold binding tape, follow these steps:
- Cut a strip of fabric on the bias, as described above in #2
- Fold the strip in half lengthwise, right sides facing each other, and press it with an iron.
- For length: See above #2 and below for knits.
- Open up the strip and fold each long edge in toward the center crease, until they meet in the middle. Press again.
- Fold the strip in half once more, along the original crease, so that the folded edges are enclosed, and press again.
- Unfold the strip so that it’s flat, with the right side facing up. Fold one edge in towards the center crease, stopping about 1/4 inch (0.6 cm) from the crease. Fold the other edge in the same way, overlapping the first fold by about 1/4 inch (0.6 cm). Press both folds.
- Fold the strip in half along the original crease, so that the folds are enclosed. Press one more time, and you should have a strip of fabric that is six layers thick.
Cutting Fabric to Create Neckbands and Binding Tapes
To create a strip of fabric long enough to make the intended neckband on a woven fabric, you will be cutting on a 45-degree angle from the grainline. The 45 degree method of cutting bias tape is a common technique used in sewing for woven fabrics, as it allows the tape to have stretch and drape well around curved edges.
You will not cut on the bias when making a neckband or binding tape with knit fabrics, jersey, stretch wovens, or fabrics with spandex. Read the pattern to indicate how to place the pattern on the fabric. Normally, knit patterns instruct to cut necklines perpendicular to the grain line (along the weft), which is where some of the stretch expands. Rarely, you might consider placing along the grain line if the weft is too stretchy and would make the neckline to stretched out.
Contrary to many other sewing sources, for certain knit fabrics we recommend 100% length of bias tape, which will accommodate the 5/8″ seam allowances to close the ends. This should hold true for stable jerseys with no elastane, or up to 5% elastane, cotton terry and cotton interlock.
For all other knits, jerseys and stretch fabrics cut .80 to .90 of the 100% length. You will have to test this yourself in trial or error.
In some cases, the stretch of the fabric on the bias may be too generous, which can cause the finished tape to stretch out of shape or even become distorted. Conversely, if the fabric is not stretching enough, it will bulk up on the curves too much and not sit flat.
To avoid this, the sewist should work with the fabric first to determine the best cutting direction.
Marking, Matching and Positioning the Raw Neckline of Bodice to the Binding Tape
Marking Quadrants
In order to apply the binding evenly around the neck opening, you need to mark the quarter points and half points of the neckband with small clip marks and also mark the quarter points and half points of the raw edge of the neckline that you will match up with the neckband points.

You will be pinning right sides of the neck facing outward. With the right sides of the band. Raw edges of the neckline to raw edges (not folded edge) of the neckband to each other. All along the circumference of the neck. It is best to use tiny clips, rather than pins for this. Pins fall out and become cumbersome.
How to sew a binding neckband tape to a neckline
Fold the Neckband tape in half lengthwise with wrong sides together and press.

StayTape: If the edges curl and prevent you from pressing the binding flat, use a strip of fusible web tape to fuse the layers together. An example is Nancy zimmerman Double Sided Basting Tape. It doesn’t even need ironing, in this instance.
With right sides together, stitch the narrow ends of the tape together to form a circle. The trick with neckband is to overlap the folded over ends of the circle so that they align. Because you will see the connection once sewn from the folded end to folded end.
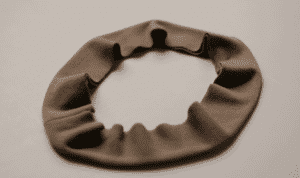
A small square of Nancy’s basting tape will hold the two ends of the circle in place while you zig zag stitch the circle closed.
Trim a little excess off of the seam allowance of the two small ends after you zigzag the circle closed, to reduce bulk.
Attach the Binding to the Neckline
Sewing a binding neckband tape to a neckline is NOT, I repeat NOT, a simple technique, but it can provide a professional finish to your garment. Follow these steps to sew a binding tape to a neckline:
- Cut a strip of fabric on the bias that is 1.5 inches or 3.81 centimeters wide and the length of the neckline plus a few extra inches for overlap.
- Fold the binding tape in half lengthwise, wrong sides together, and press.
- Pin the binding tape to the neckline, right sides together, starting at the center back of the neckline.
- Sew the binding tape to the neckline using a ¼ inch seam allowance. Be sure to expand the binding tape ever so slightly as you sew to ensure it lies flat against the neckline. By expand, we do not mean to stretch or yank.
- When you reach the center front of the neckline, stop sewing and trim the binding tape so that it overlaps the starting point by ½ inch.
- Fold the raw end of the binding tape under and pin it to the starting point. Sew in place.
- Press the binding tape away from the neckline, towards the wrong side of the garment
If you would like to see the video on how to create and attach a Neckband to a Neckline, you can purchase that video along with 45 others, 125 sewing patterns, and instructions for just $67.
Watch the video and get the pattern membership today at SewingPatternSecrets.com
See some of our other sewing tips for our Buenos Aires Beach Dress
Recent Posts
Sewing Tips and Tricks for BeginnersWelcome Sewing Buzzers!Are you new to the world of sewing? We're so glad to have you here. When we say "beginner," we understand that this term can mean different...